
You’ll need:
- Different colour dyes
- Scissors
- Plastic ziplock bags
- Plastic bucket/bowl
- Paper towels
- Water
- A plain white t-shirt for each girl
- Latex gloves
- Table cloth/surface protector
- Rubber bands
- A drying rack or washing line
Need to know:
After discussing the colours of the pride flag, get the girls to pick 3-4 colours that they think most applies to them and the colours they feel they can relate most to.
The girls will then use these colours to create their own PRIDE t-shirts using tie-dye.
If you would like more resources about how to talk to children about LGBTQ topics, we recommend this website https://www.welcomingschools.org/resources/challenging-questions/
1.
Cover up your tie dye space or table with an old tablecloth, or other plastic surface protector to ensure that the dye does not seep into the table you are using.
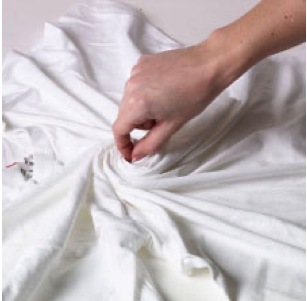
2.
Lay the t-shirt flat on your work surface. Decide the area on the fabric where you want the swirl to be. Pinch fabric at this point. Twist fabric around into a flat spiral.
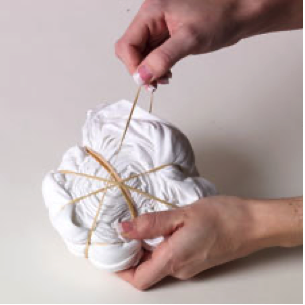
3.
Bind with rubber bands, creating six wedge shapes.
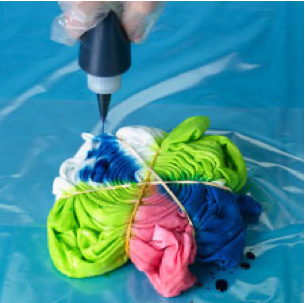
4.
Wear your gloves and then carefully apply the dye on wedges using the colours you have picked from the pride flag.
5.
Once you’ve dyed each of the sections, place the t-shirt in a plastic Ziploc bag and let it sit for at least 15-20 minutes.
6.
Remove the t-shirt from its plastic bag (make sure you’re still wearing gloves!)
Begin removing the rubber bands and prepare for some of the dye to leak out. If you find it hard to do this with your fingers, feel free to use scissors.
7.
Once you have untied your project, it is time to make sure you set your tie dye properly. Rinse out the t-shirt in cold water, making sure to squeeze as much excess dye out.
8.
Use a large bucket outside. Cover the t-shirt in water, dunk it a few times, drain the water, and repeat until the water is clear.
9.
Allow your t-shirt to air dry. Your finished t-shirt will look something like this!


Leave a Reply